High Resolution
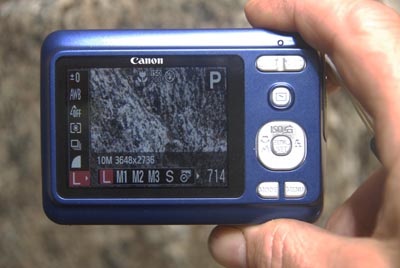
The image is sharp and would maintain a high quality even if printed as large as 8x10.
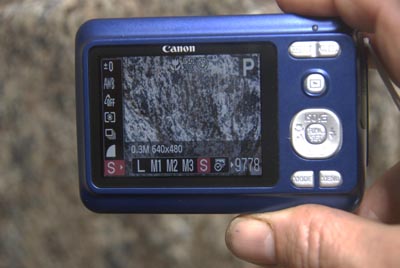
Low Resolution
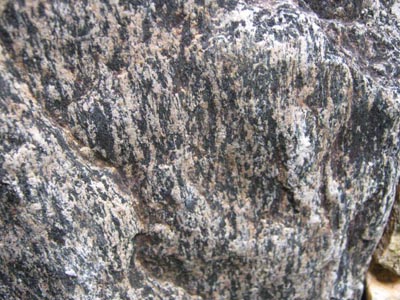
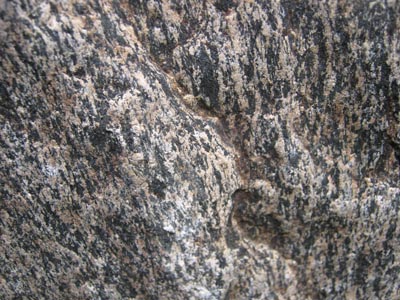
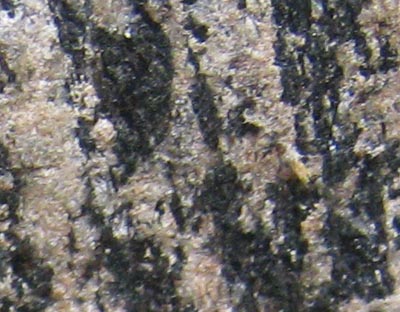
High vs. Low Resolution on close inspection

Five principles to keep in mind when using a digital camera to take pictures for the science classroom:
Digital images are made of dots, called pixels (short for "picture elements"). With enough pixels, we see the images as smooth representations of the world, so, generally, the more pixels in the image, the better the quality. However, a larger image takes up more storage space and makes the computer work harder when dealing with the image. Also, since the pixel dimension (the number of columns and rows of pixels) of a computer screen is rarely more than 1920x1200, if you are only going to view images on a computer, it is not necessary to use the highest resolution settings.
High Resolution |
|
|
|
| On this camera, the highest resolution available is 3648x2736 pixels. Each image takes up 10 MB. You could fit 100 of these images on a 1 GB drive. | The image is sharp and would maintain a high quality even if printed as large as 8x10. |
Low Resolution |
|
|
|
| At the lowest resolution on this camera, images are only 640x480 pixels, and require just .3 M B. You could fit over 3000 of these on a 1GB drive. | On this screen, the image produced looks identical to the high relsolution one above. If you zoom in, however, the difference is clear... |
High vs. Low Resolution on close inspection |
|
|
|
| A close up of the high resolution image. | A close up of the low resolution image. |
Some thoughts to guide you in your choice of image size:
A camera works by letting light in through a hole, called the aperture. Light is let in when you press the shutter release button (when you "take the picture"), and it is only let in for a given amount of time, called the shutter speed. Most point-and-shoot cameras set the aperture and shutter speed values automatically to let enough light into the camera. However, in low light levels, the shutter must be kept open for a long time (this is called a "slow shutter speed") and the shaking of the photographer's hands or the movement of the subject during the exposure will make it blurred.
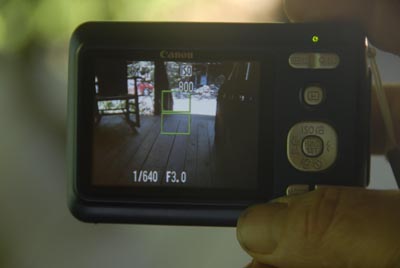
Aperture and Shutter Speed |
|
 |
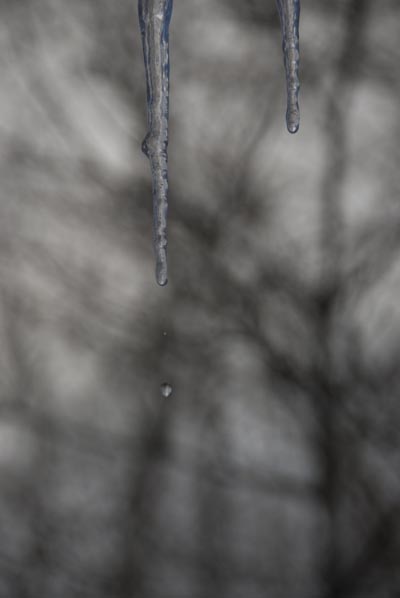 |
| When the shutter release is half-way depressed, there is an indication of the shutter speed (1/640th of a second) and the aperture (F 3.0) on the bottom of the screen. [Note that higher aperture numbers are smaller holes.] | In this photo, a fast shutter speed has been used to capture the falling drop of water below the icicle. |
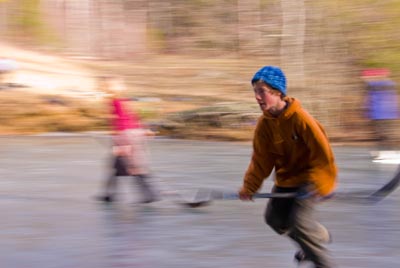
Slow Shutter Speeds |
|
 |
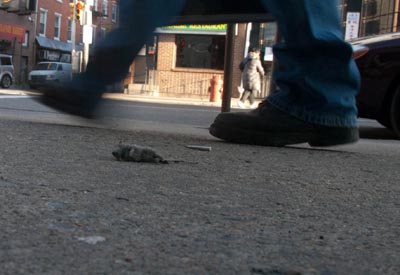 |
| While slow shutter speeds (longer than 1/30th of a second) are unusually undesirable, they can be used to show motion. Here, the camera was moved with the skater during a long exposure, so the background is blurred. | This shot was taken with a long shutter speed and a still camera. Notice that the foot that is moving is blurred. |
One way to deal with low light levels is to use a flash, but for many scientific purposes, a flash is not desirable. (See below for turning off the flash.) Another way to deal with low light is to boost the sensitivity of the camera to light (increasing a setting called the ISO). Since not as much light is needed, this adjustment allows you to take photos in low light with a relatively fast shutter speed. However, there is a trade-off, as the highest ISO settings yield slightly grainy photos with digital "noise."
ISO |
|
 |
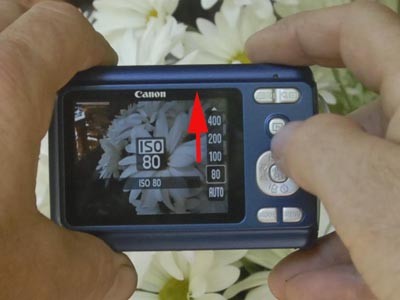 |
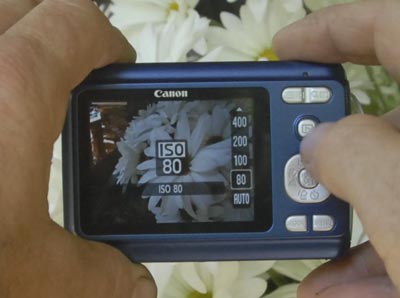
| A low ISO number corresponds to less sensitivity and thus requires a longer shutter speed. | Raising the ISO allows you to shoot in darker situations. |
How ISO Affects the Look of an Image |
|
 |
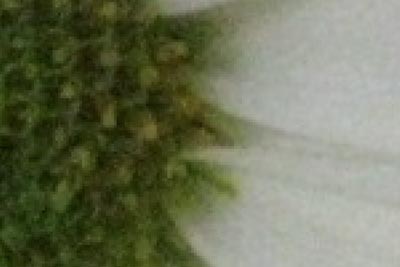 |
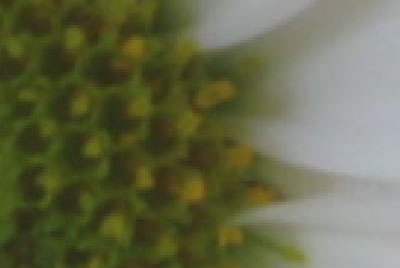
| This is a close up of part of the image of a flower shot at ISO 80. | This is a close up of the image of the same flower shot at ISO 1600. Notice the grain and digital noise. |
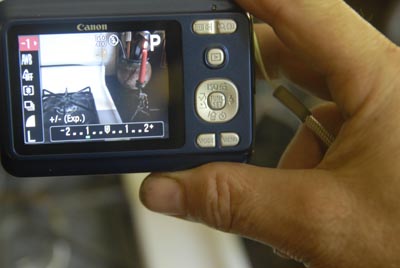
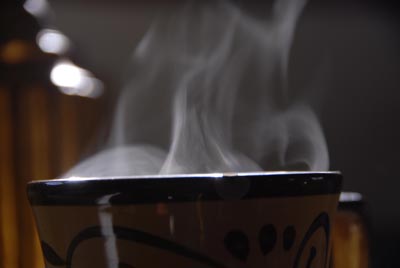
In some situations, you may want to have the camera make an image that is brighter or darker than it would automatically be. For this, most cameras have "exposure compensation" controls that allow you to make these kinds of changes.
Fooling the Camera to Shoot Darker or Lighter |
|
 |
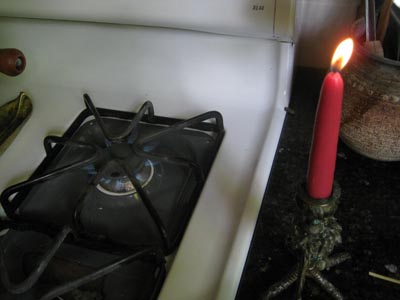 |
| If you want to make the camera give a scene less or more exposure than it would ordinarily do, you can use exposure compensation to under or overexpose. | For example, this shot was underexposed to accentuate the difference in color between the candle and stovetop flames. |
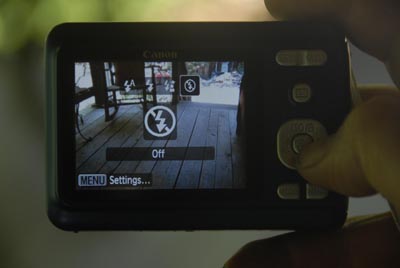
Most digital cameras have some way to turn the flash from automatic to "always off" or "always on." For images for use in science, you will generally want to turn the camera's flash off.
Turning Your Flash On and Off |
|
 |
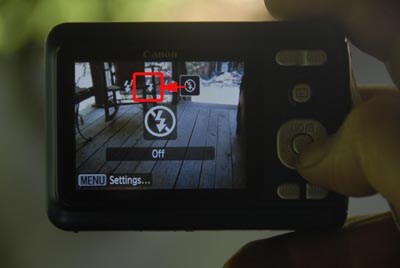 |
| Turning off your flash is good for most situations. Use a higher ISO or a tripod to get a good shot in dimmer light without a flash. | You can also turn your flash back to automatic -- or to be "always on" in all light situations. [Always on is a solid lightning bold symbol.] |
Using a Fill Flash to Balance Strong Light Differences |
|
 |
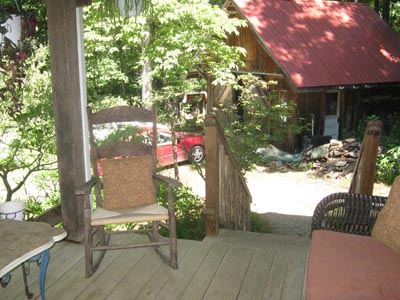 |
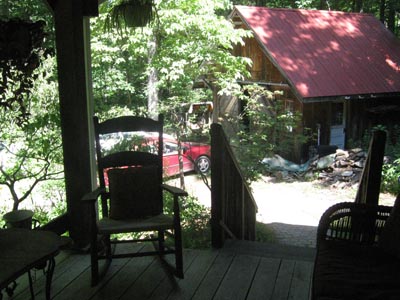
| The objects in the foreground are so much darker than the background that they come out in silhouette, even though the camera hasn't registered that flash is needed. | Turning the flash to "always on" makes the flash fire for every shot. This fills in the dark parts of the picture. |
There are three options for getting a good image in low light without a flash:
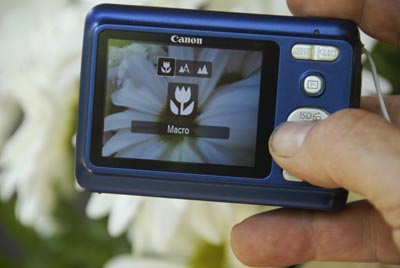
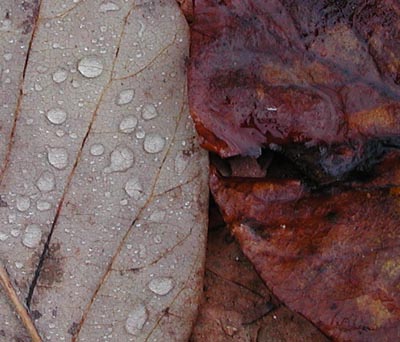
Many subjects benefit from close up images. These are best achieved not by zooming in but by getting the camera very close to the object. Most cameras have "close-up focus" function, usually indicated by a flower symbol.
Focusing in Macro |
|
 |
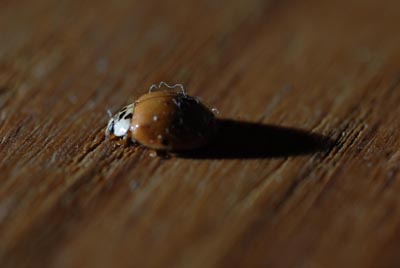 |
| For close-ups, be sure to set your camera to "Macro" and get in really tight. | The world looks very different from close range! |
Finally, remember the camera is your tool, not the other way around. There are no rules; try to represent what you like and what intrigues you.
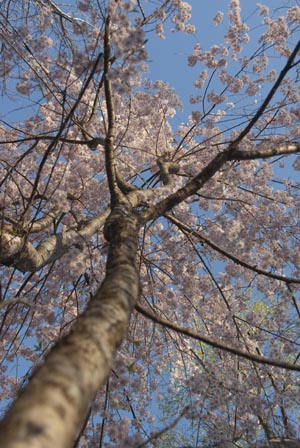
Framing: It's Okay to Shoot Vertically |
|
 |
 |
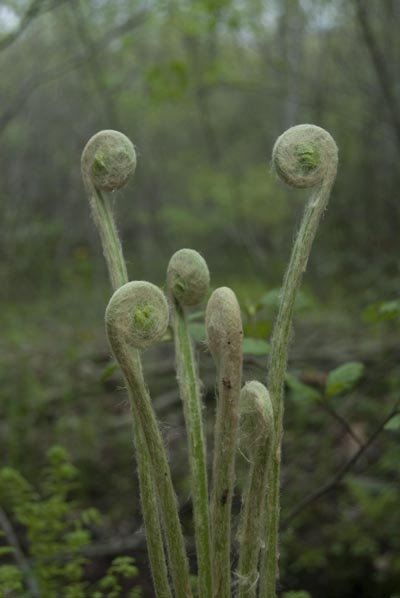
Keep Your Eyes Open for Common Curiosities |
|
 |
 |
|